Via Rancher Dashboard
This is the recommended option for installing Rancher Turtles.
Via Rancher UI, and just by adding the Turtles repository, we can easily let Rancher take care of the installation and configuration of the Cluster API Extension.
|
In case you need to review the list of prerequisites (including |
|
Before installing Rancher Turtles in your Rancher environment, Rancher’s To simplify setting up Rancher for installing Rancher Turtles, the official Rancher Turtles Helm chart includes a
|
If you would like to understand how Rancher Turtles works and what the architecture looks like, you can refer to the Architecture section.
|
If uninstalling, you can refer to Uninstalling Rancher Turtles |
Installation
-
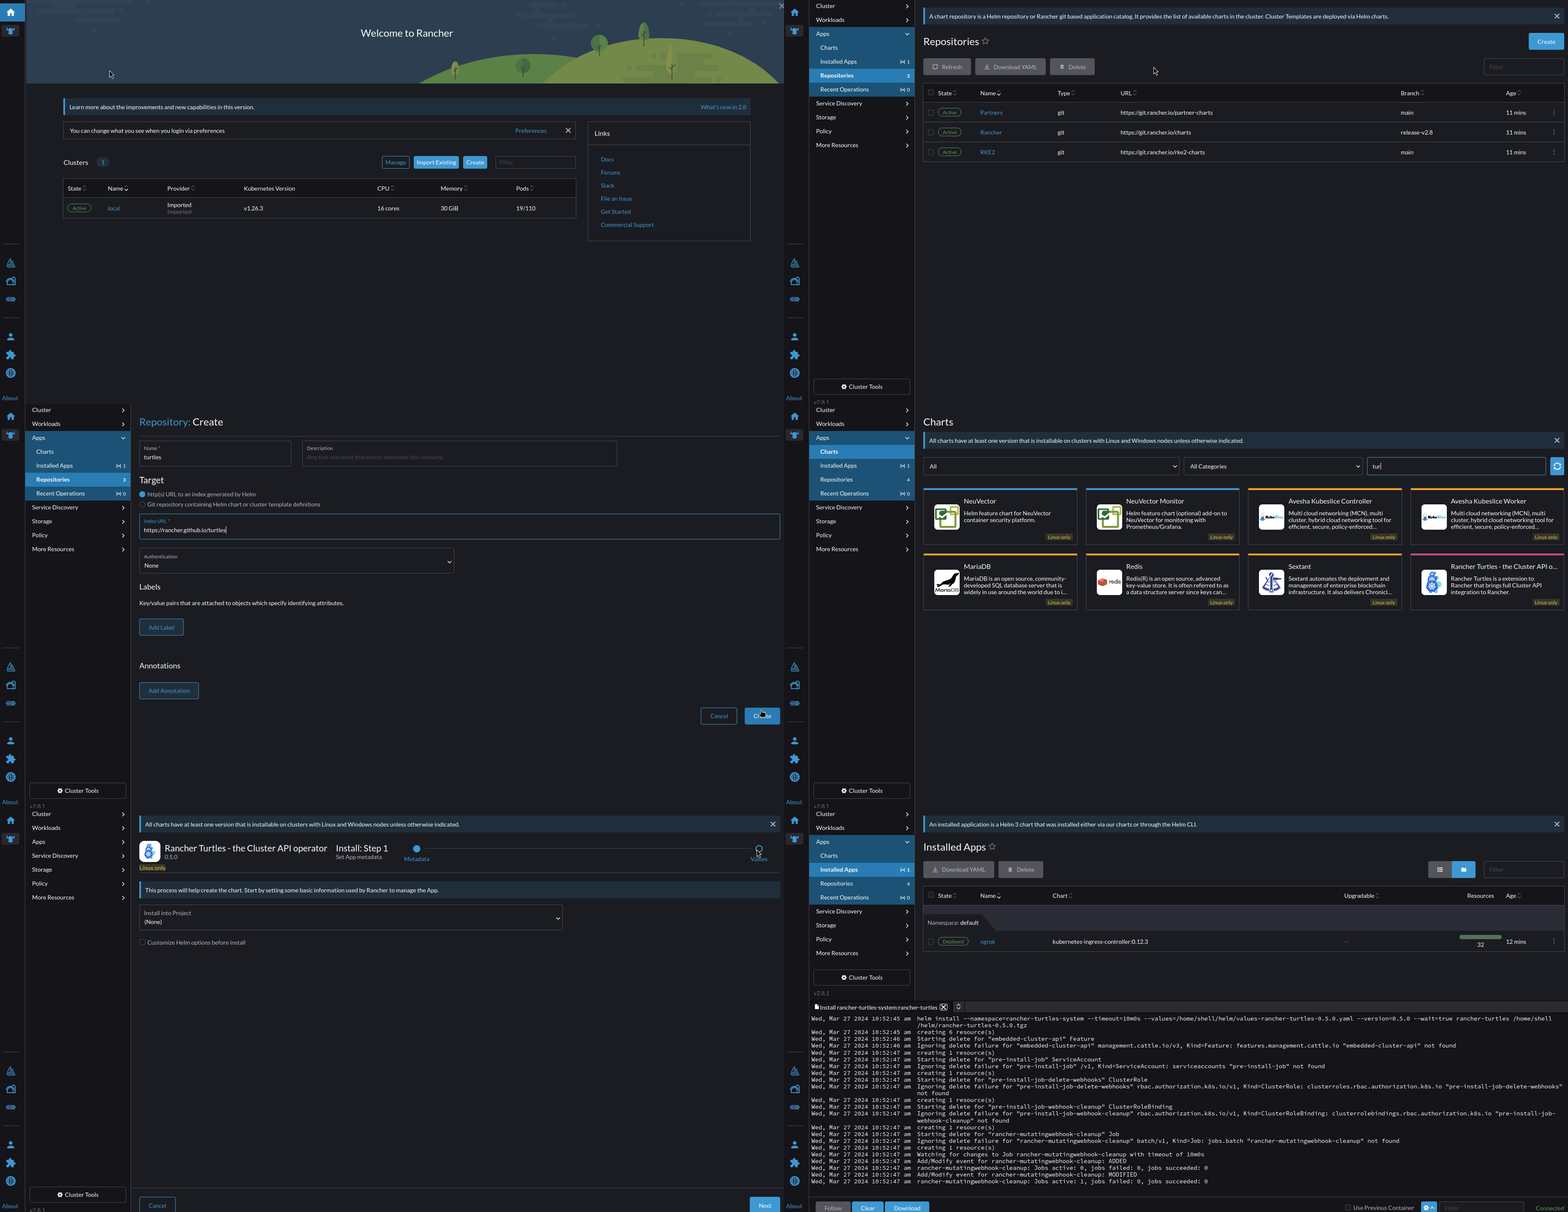
From your browser, access Rancher Manager and explore the local cluster.
-
Using the left navigation panel, go to
Apps->Repositories. -
Click
Createto add a new repository. -
Enter the following:
-
Name:
turtles. -
Index URL: https://rancher.github.io/turtles.
-
-
Wait for the
turtlesrepository to have a status ofActive. -
Go to
Apps->Charts. -
Filter for
turtles. -
Click
Rancher Turtles - the Cluster API Extension -
Click
Install->Next->Install.
|
Rancher will select not to install Turtles into a Project by default. Installing Turtles into a Project is not supported and the default configuration |

This will use the default values for the Helm chart, which are good for most installations. If your configuration requires overriding some of these defaults, you can either specify the values during installation from Rancher UI or, alternatively, you can opt for the manual installation via Helm. And, if you are interested on learning more about the available values, you can check the reference guide.
The installation may take a few minutes and, when it finishes, you will be able to see the following new deployments in the cluster:
-
rancher-turtles-system/rancher-turtles-controller-manager -
rancher-turtles-system/rancher-turtles-cluster-api-operator -
capi-system/capi-controller-manager
